Recently participated in the azure challenge at http://www.meetwindowsazure.com/fast/challenge
I created a word press site for this challenge , uploaded the video and Yo got the T-shirt as well.
I will list out the steps to create the site here. For everyone's benefit I have uploaded the video for this towards the end of the blog.
Steps to create WordPress site using Windows Azure:
I hope you have a windows azure account .
Step 1: Log in to Windows Azure Portal
Step 2: From the landing Page click on "Create an Item"
Step 3: From the next screen , choose Website.
Step 4 : Choose "From Gallery " Option.
Step 5 : Now the screen appears where you can choose and add a web app.
Scroll to the last of the list and Choose WordPress
Step 6 : Click on the arrow button in the bottom right of the screen
Step 7 : In the next screen choose a URL for your website and click next. ( arrow on bottom right)
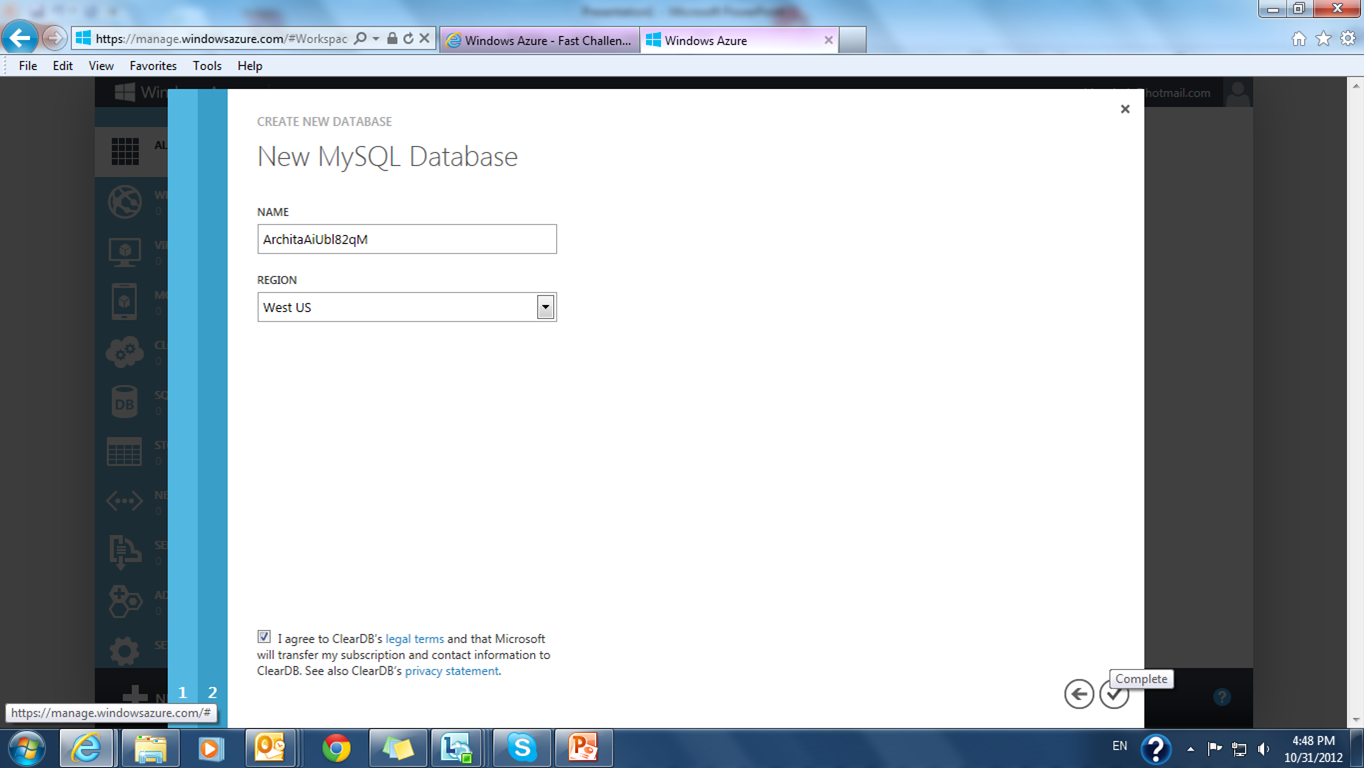
Step 8 : In the next screen give the database name.
Step 9 : Click on the complete button.( the tick on bottom right)

Step 10 : You will be redirected to the websites page. Click on the link to your website.
Step 11: In this step you need to install the WordPress in your web site.
Choose the site name and password.
Note : Userame by default is admin.
Step 12 : Now you can login to WordPress , give the username , pwd and login.
Step 13: From this screen you can change your website settings , look and feel as well write quick posts.
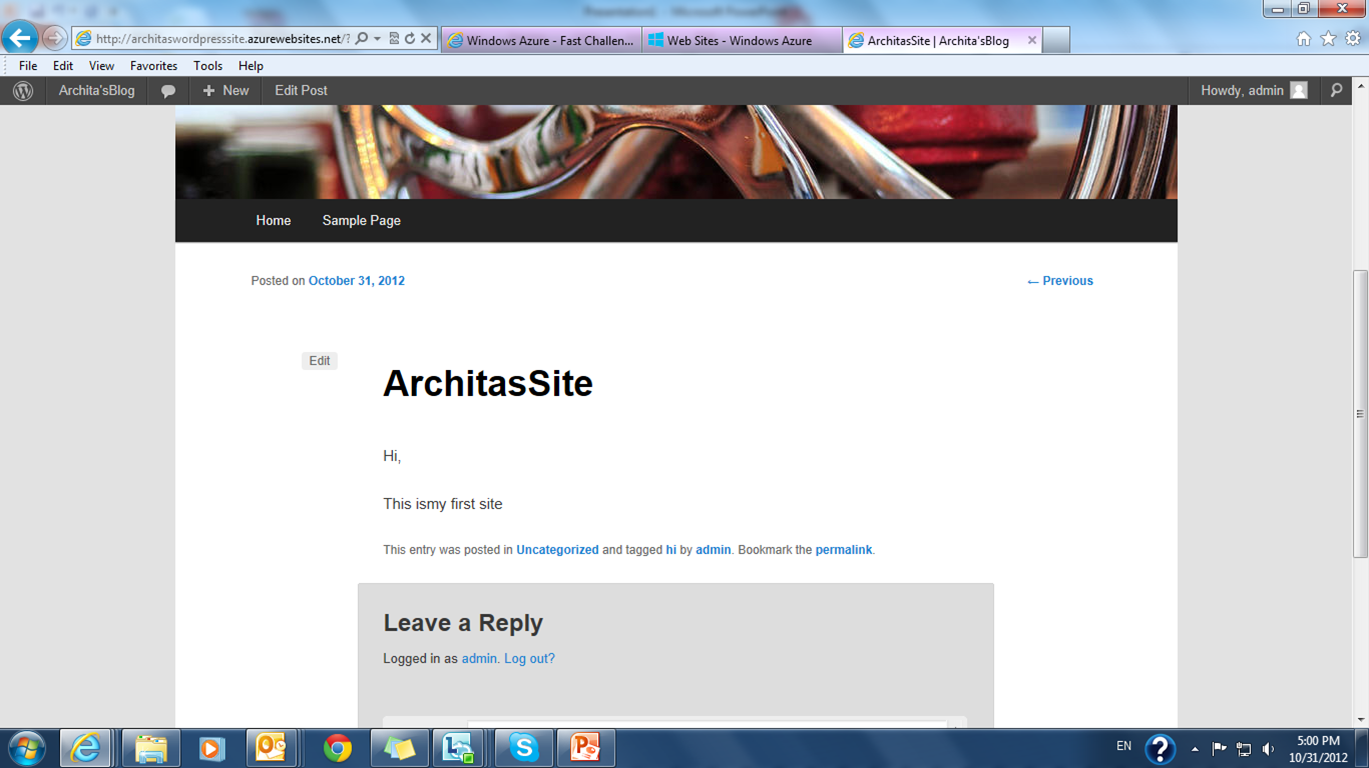
Step 14: Browse to the bottom , type in your post and say publish,
Step 15 : And you are done. Website is ready to be used by the world.

Demo video :
Demo to create a word press site
I created a word press site for this challenge , uploaded the video and Yo got the T-shirt as well.
I will list out the steps to create the site here. For everyone's benefit I have uploaded the video for this towards the end of the blog.
Steps to create WordPress site using Windows Azure:
I hope you have a windows azure account .
Step 1: Log in to Windows Azure Portal
Step 2: From the landing Page click on "Create an Item"
Step 3: From the next screen , choose Website.
Step 4 : Choose "From Gallery " Option.
Step 5 : Now the screen appears where you can choose and add a web app.
Scroll to the last of the list and Choose WordPress
Step 6 : Click on the arrow button in the bottom right of the screen
Step 7 : In the next screen choose a URL for your website and click next. ( arrow on bottom right)
Step 8 : In the next screen give the database name.
Step 9 : Click on the complete button.( the tick on bottom right)

Step 10 : You will be redirected to the websites page. Click on the link to your website.
Step 11: In this step you need to install the WordPress in your web site.
Choose the site name and password.
Note : Userame by default is admin.
Step 12 : Now you can login to WordPress , give the username , pwd and login.
Step 13: From this screen you can change your website settings , look and feel as well write quick posts.
Step 14: Browse to the bottom , type in your post and say publish,
Step 15 : And you are done. Website is ready to be used by the world.

Demo video :
Demo to create a word press site


Nice article. It's helpful to me. Thank You. Do you want to create article submission WordPress site. Click here.
ReplyDeleteHay guy Review Blog Addwin dan juga kunbal Kuasai Dunia
ReplyDeleteI appreciate your blog, it's interesting and informative regarding azure cloud migration service providers. This information attracts people to read your upcoming blog.
ReplyDeleteazure cloud migration services